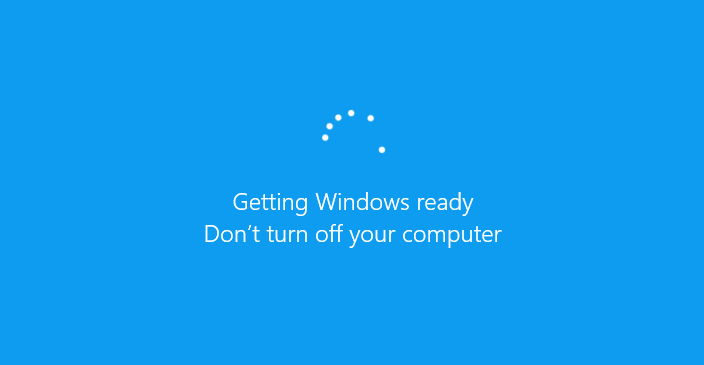
Getting Windows Ready, Don’t Turn off Your Computer

A common issue while starting/restarting Windows is a loading screen displaying “Getting Windows ready. Don’t turn off your computer”. The computer may remain stuck on this screen for hours due to various background tasks like updates, downloads, and installations.
How to Fix the Issue Getting Windows Ready, Don’t Turn off Your Computer
It is a common but not necessarily a serious problem, and simple solutions exist to rectify it. Following are the methods one may use to solve Getting Windows Ready, Don’t Turn off Your Computer issue:
Solution 1: Wait for a Long Time
The “Getting Windows Ready, Don’t Turn off Your Computer” loop should not be a severe problem usually, and most experts advise users to wait. Windows may take some time to get started, even a couple of hours or so.
It may be due to specific ongoing tasks in the background, such as updates, downloads, and installations. It is thus recommended to wait for a maximum of 2 to 3 hours. If Windows does not start even after that, there are other solutions.
Solution 2: Shut down Your PC and Power Reset Your Computer
In case the wait exceeds 2 or 3 hours, hard shut down and may solve the problem. It will clear the computer’s memory but not affect the hard disk data. To ensure this, make sure the hard disk data (HDD) activity lamp stops blinking before shutting down the computer. If the blinking stops, it signals the completion of the hard disk data update process. Then, follow the given steps:
Step 1: First of all, do a hard shut down of the computer by turning off the power button.
Step 2: Next, disconnect any peripheral device like an external storage device, USB flash drive or headphones. In case of a laptop with a detachable battery, take the battery out.
Step 3: Then, detach the power cable.
Step 4: After that, press and hold the computer’s power button for about 30 seconds. This will clear out the residual charge from the capacitors.
Step 5: Now, reinstall the battery. Plugin the power cable, but not the external devices.
Step 6: At last, turn on the computer, and see if Windows starts usually.
Solution 3: Delete Problematic Files
If the problem persists, it may be due to corrupted files. To detect and remove such files, follow the steps below.
Step 1: Firstly, go to the Windows Boot Options page.
Step 2: In the Windows Boot Options page, select the Troubleshoot option. Then, select Advanced Options.
Step 3: Then, select Command Prompt.
Step 4: In the Command Prompt window, type the following command:
C: cd WindowsSystem32LogFilesSrt. SrtTrail.txt
And press Enter to run it.
If the below line appears, it means a corrupt file has been detected:
“Boot critical file c:windowssystem32driversvsock.sys is corrupt”
Step 5: Navigate to the mentioned file using command prompt and enter Del command to delete it as follows:
C: >cd C:windowssystem32drivers

C:windowssystem32drivers>del vsock.sys
Solution 4: Do A System Restore or Reset
This process involves restoring the system to the previous state that existed before the problem. However, before trying this method, you must back up all essential data. This can be done even if you are unable to restart Windows due to the “Getting Windows ready” screen remaining. To backup data without booting into Windows, the following components are needed:
- Another working computer.
- USB flash drive.
- External hard drive or disk.
- Software like EaseUS Todo Backup for file backup.
The bootable disk has to be created on the other computer. Then, it must be inserted into the computer in question, and the empty USB flash drive must be plugged in.
If another working computer isn’t available, another option is to use a hard drive recovery software after the system restore. However, the integrity of your data is better safeguarded in the first method.
Once data has been backed up, follow the steps below for system restore:
Step 1: Firstly, go to the Windows Boot Options page.
Step 2: Secondly, select the Troubleshoot option and then, select Advanced Options.
Step 3: Under Advanced Options, select System Restore option. Or choose the System Image Recovery option if you have a system image backup.
Step 4: Proceed as per the displayed wizard instructions and select the system restore point. After all, steps, click Finish.
Read Next:
Conclusion
Usually, the problem of the “Getting Windows Ready, Don’t Turn off Your Computer” loop should be resolved through the first two methods – waiting or power reset. If they fail, the remaining two ways should work. In the methods 3 and 4, directly accessing the Windows Boot Options page is not possible with the screen displaying “Getting Windows ready”.
A Windows installation media can be created on a USB installation drive or a disk, by running a Windows Media Creation Tool on another computer. You can then boot into the computer facing the problem using the USB or disk, and proceed with the solutions. If all these solutions fail, reinstalling Windows using the Windows Media Creation Tool in itself is the last option.


